 China
China English
 Русский
 Español
 Français
 Português
Specializing in Laser Cutting, Marking and Engraving Machines


Specializing in Laser Cutting, Marking and Engraving Machines
Dongguan Eastern Laser Tech Co., Ltd.
Add.: No.1, Datangheng Road, Womu Industry Zone, Wanjiang District, Dongguan City, Guangdong Province, China
Tel.: 0086 769 27223327
What'sapp: 008613929256735
E-mail: sales@etlaser.com
Skype: stevenlaser
Website: www.etlaser.com


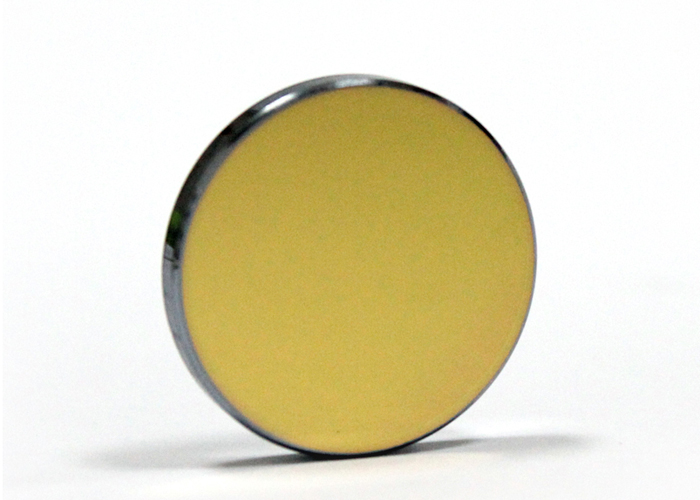


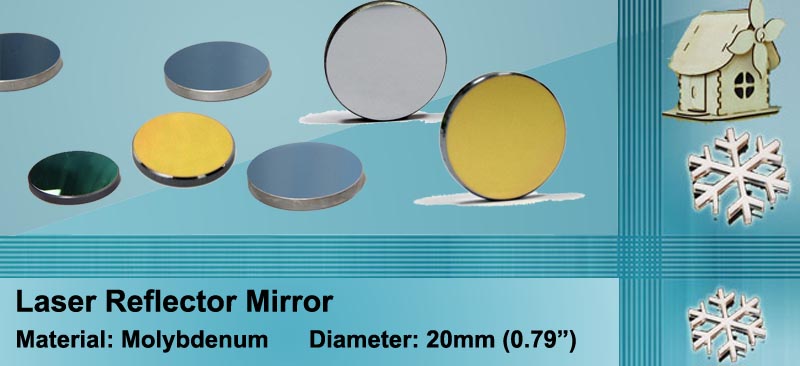
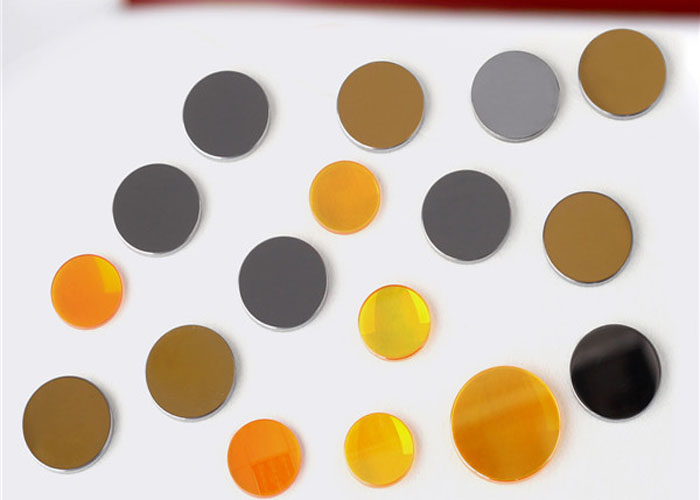
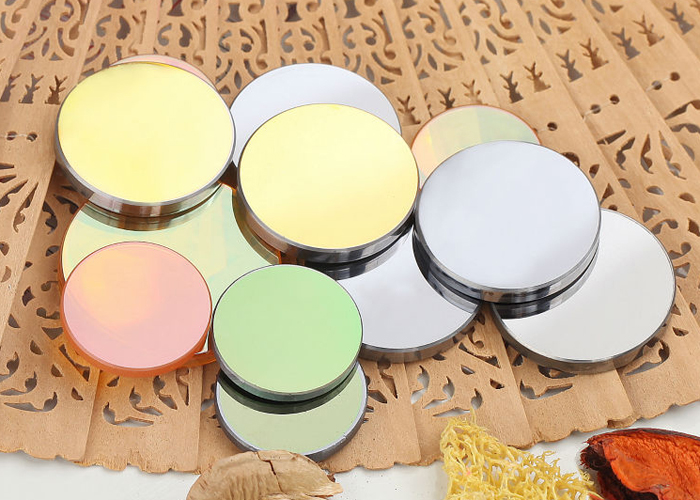
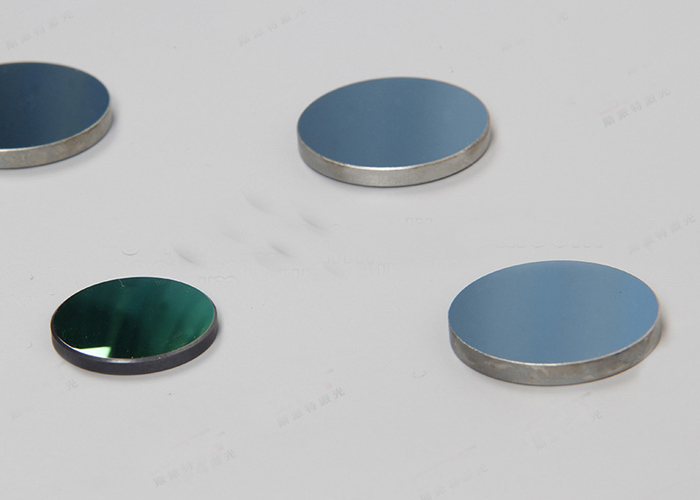
There are two kinds of commonplace laser mirrors, namely molybdenum laser mirror and silicon laser mirror, and Eastern Laser offers both top-notch laser mirrors with high reflectivity and high durability.

Features:
Model: ET-MO-20 laser reflector mirror
Diameter: 0.79" (20mm)
Thickness :3mm/0.12"
Material :Molybdenum
Side 1 Radius:Plano
Side 1 Reflectivity:>97%
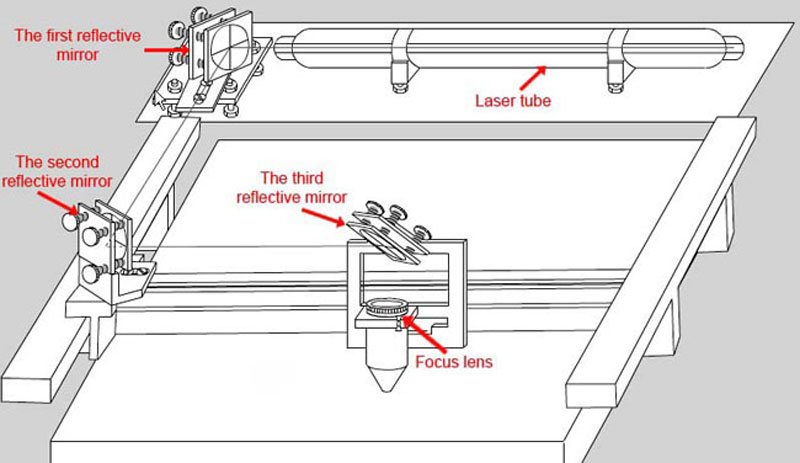
Usage : Apply for co2 laser cutting and engraving
This would be a great mirror for a co2 engraver or laser cutter, to relect the laser beam into laser head.
We adopt the top Molybdenum material in the industry to produce co2 laser reflector mirror.
Specifications:
|
Part No. |
Material |
Diameter |
E.T. |
Coating |
|
ET-MO-20 |
Molybdenum |
0.79" (20mm) |
3mm |
without |
Diameter Tolerance: +0,-0.13mm/+0.000’’ -0.005’’
Thickness Tolerance: ±0.25mm/±0.010’’
Clear Aperture >80%
Flatness λ/2 per 1" Dia
Parallelism < 3 arc minutes
Surface Quality 40/20 scratch and dig
Advantages
• Adopted Molybdenum material imported from USA which can go with high power density;Deliang system, and increased the laser reflecting of the parts;
• The reflecting rate of working waveband in co2 laser industry reaches 97%;
• The refllector mirror consist in many advantages such as high laser reflecting rate, wihtout coating anti wiping, higher luminous flux, etc. For which materially improves your work efficiency.
Benefits
•High reflecting rate, better effect in cutting and engraving, bearable for high power density, and without any coating against peeling off and durable for wiping;
• Without coating, reduction or elimination on stray light of the optical system;
• The cutting & engraving speed of some applications improved, and the ability for reflected light enhanced;
• More bearable for wiping, longer life span as well as better process to polish.
Used for
Widely used in the following brands CO2 laser engraving & cutting machines:Redsail, Kaitian, Yueming, Goldenlaser, Senfeng, Shenhui, York Laser, Hanma Laser, Ruijie, and Bodor, ETL, etc.
Detail

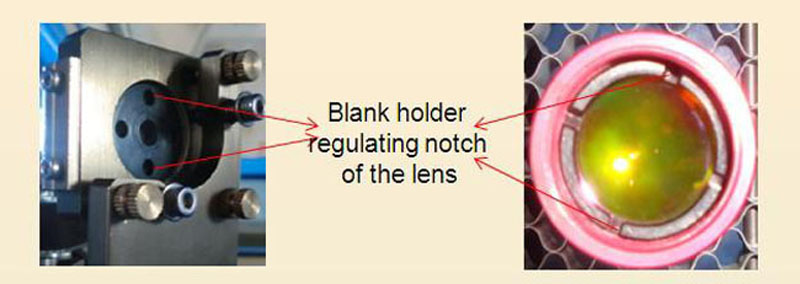
Usage
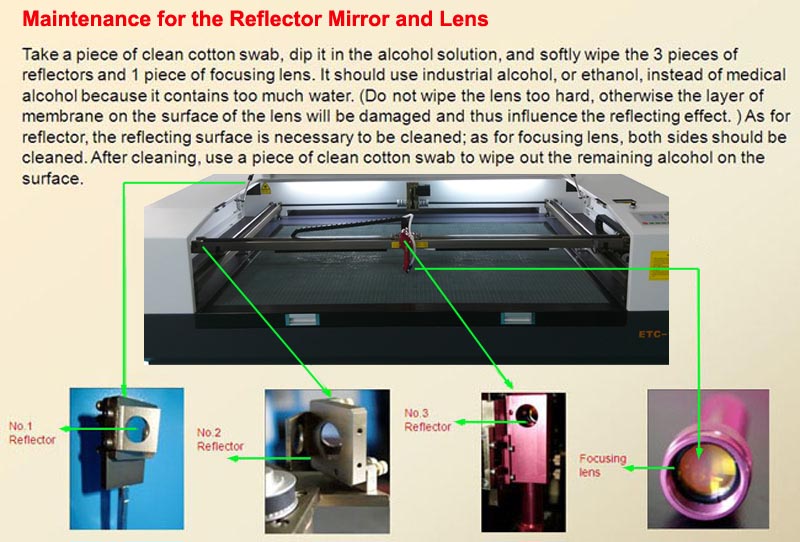
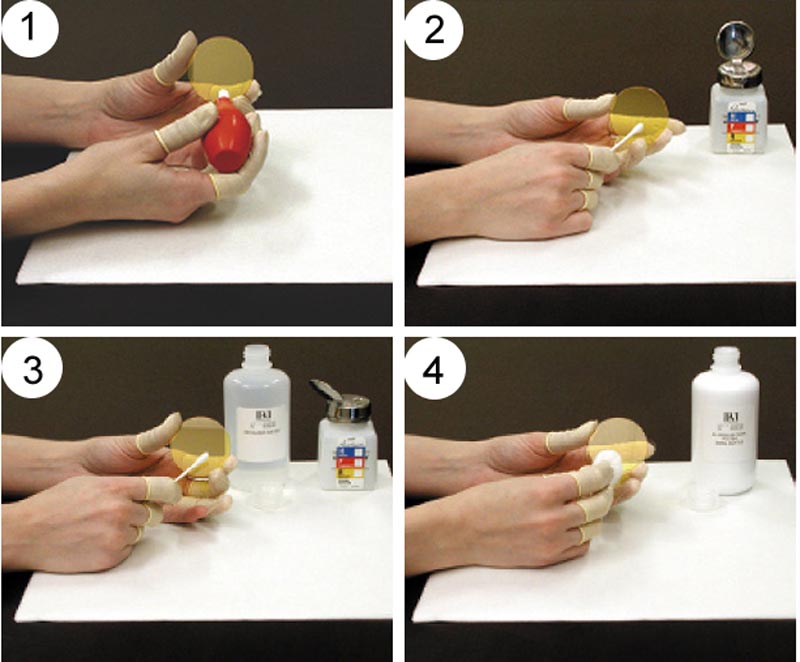
Optics Handling & Cleaning
Great care should be taken when handling infrared optics. Please note the following precautions:
1. Always wear powder-free finger cots or rubber/latex gloves when handling optics. Dirt and oil from the skin can severely contaminate optics, causing a major degradation in performance.
2. Do not use any tools to manipulate optics -- this includes tweezers or picks.
3. Always place optics on supplied lens tissue for protection.
4. Never place optics on a hard or rough surface. Infrared optics can be easily scratched.
5. Bare gold or bare copper should never be cleaned or touched.
6. All materials used for infrared optics are fragile, whether single crystal or polycrystalline, large or fine grained. They are not as strong as glass and will not withstand procedures normally used on glass optics.
Due to the problems encountered when cleaning mounted optics, it is recommended that the cleaning procedures described here be performed only on unmounted optics.
Step 1 - Mild Cleaning for Light Contamination (dust, lint particles)
Use an air bulb to blow off any loose contaminants from the optic surface before proceeding to the cleaning steps. If this step does not remove the contamination, continue to Step 2.
Step 2 - Mild Cleaning for Light Contamination (smudges, fingerprints)
Dampen an unused cotton swab or a cotton ball with acetone or isopropyl alcohol. Gently wipe the surface with the damp cotton. Do not rub hard. Drag the cotton across the surface just fast enough so that the liquid evaporates right behind the cotton. This should leave no streaks. If this step does not remove the contamination, continue to Step 3.
Note: Use only paper-bodied 100% cotton swabs and high-quality surgical cotton balls.
Step 3 - Moderate Cleaning for Moderate Contamination (spittle, oils)
Dampen an unused cotton swab or cotton ball with white distilled vinegar. Using light pressure, wipe the optic’s surface with the damp cotton. Wipe excess distilled vinegar with a clean dry cotton swab. Immediately dampen a cotton swab or cotton ball with acetone. Gently wipe the optic’s surface to remove any acetic acid. If this step does not remove the contamination, continue to Step 4.
Note:Use only paper-bodied 100% cotton swabs.
Step 4 - Aggressive Cleaning for Severely Contaminated Optics (splatter)
Caution: Step 4 should NEVER be performed on new or unused laser optics. These steps are to be done only on optics that have become severely contaminated from use and have no acceptable results yielded from Steps 2 or 3 as previously noted.
If the thin-film coating is removed, the optic's performance will be destroyed. A change in apparent color indicates the removal of the thin-film coating.
For severely contaminated and dirty optics, an optical polishing compound may need to be used to remove the absorbing contamination film from the optic.
A.Shake the container of polish thoroughly before opening. Pour four or five drops of polish onto a cotton ball. Gently move the cotton ball in circular patterns across the surface to be cleaned. Do not press down on the cotton ball! Let the cotton ball drag lightly across the surface under its own weight. If too much pressure is applied, the polish will quickly scratch the optic’s surface. Rotate the optic frequently to avoid excessive polishing in any one direction. Clean the optic in this manner for no more than 30 seconds. If, at any time during this step, you notice the optic’s surface change color, stop polishing immediately. This color change indicates that the outer portion of the thin-film coating is being eroded.
Step 4 (continued)
B.After using the polish, wet an unused cotton ball with distilled water and gently swab the optic's surface. Thoroughly wet the surface to remove as much of the polish residue as possible. Do not let the optic’s surface dry! This will make the remaining polish removal much more difficult.
(For a mounted optic, a fluffed cotton swab may be substituted. Try to remove as much polish residue as possible, especially near the mount's edges.)
Step 4 (coninued)
C.Quickly wet a fluffed cotton swab with isopropyl alcohol and gently clean the optic surface thoroughly. Cover the entire surface with the swab to dislodge as much polish residue as possible.
Step 4 (coninued)
D. Wet a fluffed cotton swab with acetone and clean the optic’s surface, removing any remaining isopropyl alcohol and polish residue in the process. When performing the final cleaning with acetone, lightly drag the cotton swab across the optic, overlapping strokes until the entire surface has been wiped. Move the swab very slowly for the final strokes to assure that the acetone on the optic’s surface dries immediately behind the swab. This will eliminate streaks on the surface.
NOTE
Contamination and damage types, such as metal splatter, pits, etc, cannot be removed. If the optic shows the contamination or damage mentioned, it will probably need to be replaced.